Tuesday, September 29, 2015

PHOTO'S BEE HIVE ATTACK! Beetle trap bottom board replacement

This is the second time I have opened up this hive and been attacked by the bees.  It's certainly a hot hive.  I am okay walking around the hive, but as soon as I go in to it all hell breaks loose.  I smoked the bees and walked away.  Something about taking the honey box off they didn't like that.   I think it's justified with the response I got.
Bee Hive on the Right is that one that I worked on

       It's been since early August since I have really opened up this bee hive.  I have not done anything to this hive other then put a new frame in it a couple weeks ago.    Since I don't have anything to really do no reason to go into the bee hive.  I found out by looking inside that the bees have made honey comb on the top side of the frames in the brood chamber (Super) and connected it to the Super frames above.  I have 2 supers.  1 brood and 1 honey.  I suspect it's pretty much honey in the bottom super.  They've attached honey comb to the wall and the 1st frame next to it.  I don't really care how they keep the house at this point in time.  Next Spring I will do a complete frame swap in the bottom to get things organized and on the right path with proper order.   The disorganization is only in the brood chamber.  The honey super is new frames since I put it on.  If your not familiar with the read on the bee hive, this was the hive in May that I rescued.  I ended up cleaning up some of the original comb, but it's a mess,  Oh well all is okay for now.
This is some burr or trash comb I removed.


This is what happened.  I got a bunch of bees in my face when I lifted the first box off the bee hive and onto the stand.  This as I said before was because the separation of the burr comb that was on top of the frames.  Probably some lifting and dropping of the frames or rattling when this happened and the bees came out at me.  The bees temperament previously was fine back in August and now it's a "HOT" hive meaning anything you do with them, they come out at me.  This I suspect is because the hive beetles that have gone into the bee hive.  Grumpy bees are justified and I understand.

After I got the top box off the bottom box separating the 2,  I placed the bottom brood chamber onto the new bottom board
West Beetle Trap with modifications

with the beetle trap.   I then had to walk a block away because the amount of bees  swarming me.  Unfortunately I had a delivery truck arrive.  He got the pallet off the truck and promptly got inside his truck and drove off.  He didn't like the bees flying around me or him.  I then went back with the smoker and smoked them.  I lifted the brood chamber off the existing bottom board and placed it on the beetle trap bottom board.  Placed the honey box on the brood chamber and walked away.  I managed to grab the bottom board and place it on the firewood shed roof where the bees can clean up the honey that dripped down on it.  About 10 minutes later I returned and strapped the bee hive down securing it.  I then proceeded to walk to my shop where I was safe and could get the bees to stay outside while I was inside.  About 5 minutes later I was able to go inside to my house.  No bee stings.
Hive Tool used to scrape the burr comb and loosen the bee super(Boxes) apart from each other for removal and transfer


Wooden shim I had to make for the beetle trap.
Beetle trap grate modification Before (Upper photo)  
45 degree angle cut on the lip of the grate (AFTER MODIFICATION)

I had to modify the bottom board to fit the West beetle trap.  I had to cut a 1" piece of wood that was 3/4" wide.  I had to notch that piece so the tray would slide into the wood shim.  Under that grate is vegetable oil.  Just enough to coat the bottom about 3/16" probably or 1/8"   Enough for the beetles to drown in and die.    On that grate I cut a 45 degree angle on the front of it cause it had a lip on it.  This is what I was talking about in the blog I wrote yesterday.  Poorly made.  I shouldn't have to cut and sand the front grate to make a smooth transition.  I have watched video's where the hive beetles like to follow tracks or grooves.  Why would they not recess this as they did the 3 sides is dumb.If you have to clean it out you have to pull the whole tray out, so what's with the tray not being recessed is just laziness.  On the shim piece of wood on the left I wanted to round that piece so they wouldn't hang out on that gap.  I want them to go into the grated part.  I cut a small piece of wood and sanded it with an electric sander so it's got a curve. 

Hope for the best is what I am doing.   I suspect they'll make it through this beetle problem.   Bee Hive#1 I will see how they are doing and if I need a beetle trap for them.  They have a screened bottom board with out an oil tray.


Monday, September 28, 2015

Video: Beetle Trap for Bee Hive Arrived and Review

Ordered this I believe Monday last week.  Arrived Monday today.  Shipping was $15.45 for 2 of these I think.  I was going out of town, so building this wasn't really in the cards.   Company I used was Dadant.  I do not recommend buying these.  These are apparently called "West Beetle Traps"  The plastic design I don't have a problem with.  Great quality injected molded ABS Plastic or Polyethlyne.  This came with NO instuctions and No Screws.  Did not say this when I purchased it.

I had to call Dadant twice to get them to email me instructions.  Yes, simple logical and I could figure it out, but I have never done an installation of these and because of poor fit I wasn't sure.  This certainly has room for truck loads of improvements.  Will I buy another one.  UH NO.  not only no but, "HELL NO".

This is suppose to slide in with an active bee hive entrance.  This means that bees get pushed to the back and can get killed.  I am suppose to clean this out every 1 to 2 weeks.  So you do the math on this and can see that continually killing bees for 40 weeks is going to be rather stupid.

For now I will use it as I don't want to go spend more money at this time.  $46.00 is enough.  If you want something done right build it yourself and this rings so true.  I feel as though someone knew this didn't work fully, but it's functional and said "Ah the hell with it I am sick of dealing with it lets just put it on the mkt and be done with it and don't worry about it"  So the customer gets screwed.

What am I complaining about?  I didn't get instructions, no screws and a gap on the sides meaning that I have to build a shim for this, so the bees and beetles don't get below the beetle trap.  I have a spare bottom board I am using.  I will unscrew the bee hive Super and the bottom board on the existing and move the bee hive on to the "West Beetle Trap" with the bottom board modified.

Hindsite: Go buy $25 of #8 hardware cloth (Metal mesh) build a 4 sided box.  1 side that slides out, so the tray can be removed and be done with it.  My business is a plastics company, so making stuff like this isn't hard, but it's time.  My laziness has now come back to bite me in the butt.

I will post a video later.

Monday, September 21, 2015

OUCH! I got attacked by my bee hive today

The title says just what happened.  I was putting in a trial frame with something I am attempting to do with the bees.  I just thought I would unstrap the bee hive, pull a frame out that didn't have comb on it and put in the test frame and close up the bee hive.

I get suited up in the cheap bee suit.  I mean why am I needing to spend the time getting ready to do battle with my bees.  Shouldn't have to cause all I am doing is something as quick as 10 seconds.  I was wearing shorts too.  The problem with putting on the full suit is that it takes about 3 minutes to put it on and 3 minutes to take it off.  Thats the beauty of the cheap Chinese bee suit is it's a shirt more or less that you put on and it's got the vail with the wide brim on it that isn't removable.  So I just put it on like a shirt, walked out to the bee yard and put my gloves on.  I took the ratchet strap off.  I popped the lid off, full of bees on the top board.  Bees start flying.  Well I startled them is what I am thinking.  I pull the inner cover off and immediately about 50 bees take flight and they're letting me know they are not happy.

2 things I can do, is to run away or just deal with it.  I was like it's quick.  I forgot my hive tool dang it.  SO I get my fat fingers with leather gloves on the frame trying to pull it up out of the hive body and it's not coming.  More bees are coming out.  Zap on the leg!  Stung dang it.  Okay this isn't going as planned.  I don't know what in the world is going on today with them, but clearly they're not happy.

I go trucking off to the oak trees and I got bees all over me.  in an out weaving in  amongst the trees and I am panicked a bit.  I still hear them buzzing.  In and out and unfortunately I didn't see that 3 inch oak tree branch and I mean I smacked my foreghead.  Blood is dripping.  Okay forget the bees I am now worse then being stung more.  I just go in the house close the door.  1 bee is at the inside screen.  Open it up and it flys off.  I get a paper towel and hold it.  Call for Elisa.  I am in the bathroom all worked up.  I tell her my story and she just says "well that's why you have the bee suit you paid for"  I explain that this isn't a normal situation that it calls for.  They came out at me.  It should be 10 second job.  open it up, pull a frame and replace it close it up and I am done.  Washed off the forhead.  Put some ointment on it and a large bandage.

I go get suited up, get the smoker out.  Light the smoker and I mean I got that smoker just puffing.  I have had situations where you think it's lit and it's not.  Sometimes it's weak smoke.  SO I SMOKED Them and the other bee hive cause I didn't want anything more then I was dealing with.  Got it done and when I pulled the frame a hive beetle was on it.  Damn it!  Damn beetles is why the hive is so quick to come at me.  I put the new frame in and close it up and I am done.

Tonight I just bought 2 bottom boards that are for beetle traps.  I weighted the cost and I really don't want to fool with it.  About the time I get this thing built and spend the money it's just not worth my time.  SO for about $47 bucks 2 bottom boards are bought with shipping cost. 

Done and Done.

Thursday, September 17, 2015

Bee Frame photos - Not what you want to see in a bee hive

I did a Ferrell Bee removal last week to discover that the conditions were unfortunately too gone to save.  1 of the things bee hives can get is small hive beetles.  These beetles originally are from Aftica and ended up in Florida I think in the 80's.  The beetles have spread to the southern states of the US.
             It's a bee keepers nightmare.  My nightmare was seeing the fly's on the outside of the Nuc Box bee hive I had the bees in.  Only to discover that the frames of bee comb I had transfered over had 50 to 75 percent small hive beetle larvae.  The larvae eats comb, nectar, honey and pollen and craps as it goes ruining everything and making it a huge slime goo mess.   This leaves a putrid odor too.  The bees won't go on the comb that is infested.  My Ferrell Bees were on the inside walls of the Nuc Box
             I ended up removing the frames to a temporary box.  Got my torch out and got as many bees as I could to fly away.  I torched the inside of the box.  This killed any larvae of the beetles and the adult beetles.  I then took the frames and walked quite a ways distance from the bee yard.  Not many bees were on the frames.  The bees flew off and I wrapped the bee frames and placed them in the freezer.  I froze them up until trash day today Thursday.  I don't even want to clean these frames up.  I can build more easily and have lots of wood to do this.  4 frames is about $.50 if I had to guess.  Commercially bought frames are about $4.50 Ea with shipping to your door.  You can see why most bee keepers just make frames.  Your only talking glue and nails if you have free wood. 

So I doubt I will ever bring back a Ferrell colony to the bee yard again with out quarantine procedure of 3 months.   It's a pain to have something happen to me like this.  Hopefully the other 2 bee hives don't get Hive beetles, but it's inevitable I think. 


Monday, September 14, 2015

Gone- Bees- Owl House Bunch

I'm happy about what happened.  I no longer have the bees.  I believe that I had a queen and she left with the remaining bees.  Pretty much when they were disrupted at the level they were subjected to I would think that is a fair assessment. 

It is possible that the bees didn't have a queen and they went in to the other 2 bee hives.  This AM the bees in hive #1 and 2 are calm, so I doubt this is the case.  They were stirred up when the bees attempted to go to join the colonies. 

What is next.  I have to get the torch  the bee hive inside killing any remaining hive beetles.  Yes beetles are still in the bee hive unfortunately.  Remember I didn't remove any of the upper frames and burn the box. 

Lesson learned is that I won't transport any ferrell bees to my bee yard.  The removal  risk is greater then the reward.  I now have to prepare my 2 bee hives for beetles this winter.   I will install what ever I come up with and make hopefully when it's still warm out.  I am pretty handy at doing this sort of thing designed and built.  I will look at what is available on the market and make my own bee hive mite protection is what I suspect.   I can fabricate plastic and make something work similar to the beetle jail.  Mites seem to like grooves and 90 degree corners, so I am thinking something like 1/8 or 3/16" groove in hive body exterior going down to the landing board where I can have hardware cloth that they fall into an oil tray will work.  Just a pain cause I will have to make the entrance different.

My goal:  These hive beetles hopefully will not be successful to the point they're unable to reproduce and I won't have a problem.   I need to do everything I can to prevent hive beetles completing the life cycle in the bee hives

Prevention and eradication of known beetles is the step I am going to take. 

Sometimes doing the right thing is the wrong thing.  This has definitely been the case and it's not been worth it at the expense of my other 2 bee hives. 


Saturday, September 12, 2015

CRAP! Bees infested with SHB larvae in the Owl House Bunch Nuc Box

Just when I thought things were settled down......  I noted fly's around the outside side and that's not normal.  I immediately suited up and removed the top box off the bottom.  I pulled a frame and it was covered in Small Hive Beatle larvae.  Damn! Damn Damn.  Going to town they had made a pile of mush in about 1/3rd of the frame.  I pulled the others.  Same thing!  Just coated with goo and crawling magets.

I opted to get the frames transferred over to another Nuc box while I emptied out the box with the bees the best I could.  Grabbed handfuls of goo and tossed it in a pile.  Moved the bees off the frame best I could.  Walked them under the oak tree where my propane torch is.  I took the Nuc Box and pounded on it to get the bees to fly away.  Some did and some didn't.  Torched the inside of the box, bees that remained and all the larvae and beetles.  No more problem in the box.  I took the frames to the porch and got the bees off best I could.  Took the 4 frames and put them in plastic bag and put them in the freezer.  They will remain in the freezer for 48 hours.  I will pull them and put them back in the box with the Owl Bunch Gang. 

Long story short this probably is going to be the start of serious problems for me with the introduction of Small hive beetles.  Damn! DAMN DAMN.  Try and do something wonderful and it has now backfired.  I didn't take any photo's as this is just a quick discovery and I handled it immediately. 

I probably didn't have much option other then to do what I did.  That's all I know how to do.  I don't know if the bees will make it.  I can't combine them in the other hives, that's for sure.    The only way I could do that is if they just didn't have small hive beetles.  Sigh!  double down sigh!   Please Bee hive #1 and 2 let them co-exist in your colony. 

Zak


Bee Photo's of Owl House Bunch new 2 story home

I acquired a Ferrell Colony of bees the end of August.  I brought them home and put the box on a 4x4 post so that they'd acclimate and settle.  My plan was to remove them from the wooden box and put them in a 5 frame Nuc Box double deep.  Basically it's half a bee hive and another box on top for those that don't know about bee boxes.    So 10 frames in total.

I had to tear the box rear wall off to expose the hive.  Put the comb in frames and then put it in the Nuc box.  Remove the bees by hand scooping them out of the box and placing them in the Nuc box.    Placing the 2nd box on top was needed because I had too many bees.  I had about 75 percent nurse bees, so the queen definitely is a great layer.

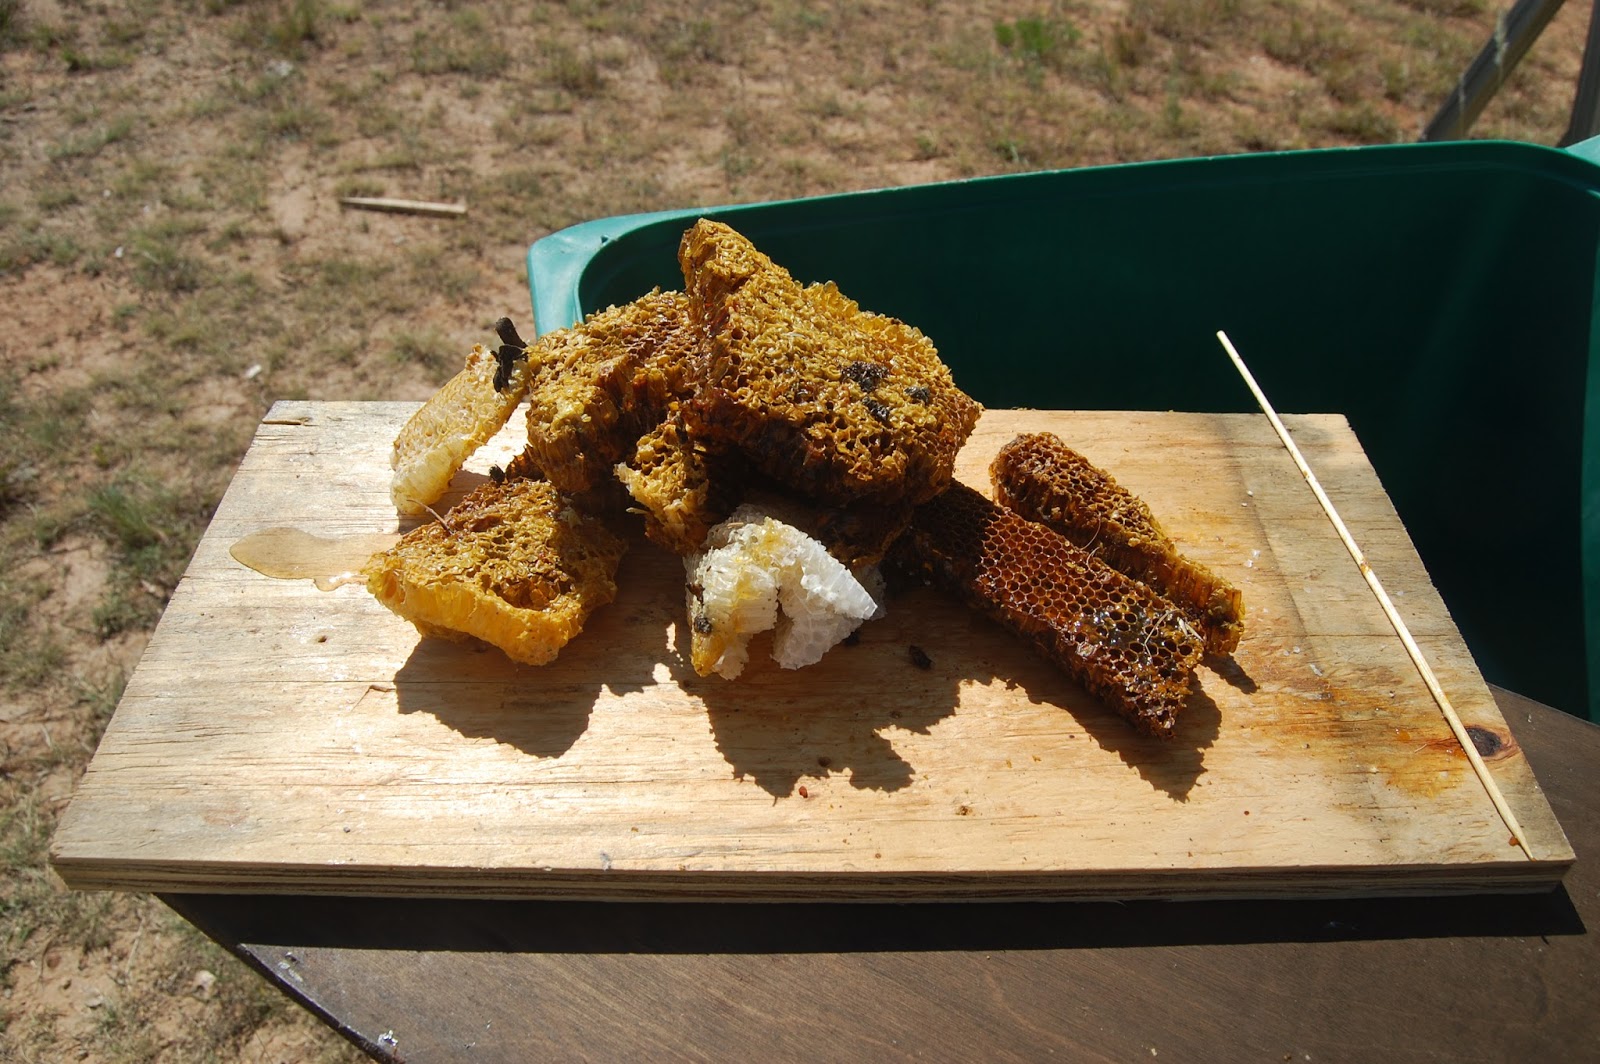
I only put comb in 5 frames on the bottom.  The rest of the comb was honey and I didn't fool with it trying to put it in frames for the bees.  They have enough bees and nurse bees to fix the colony and get going immediately.  I stacked the honey comb on a piece of plywood for the bees to clean up any of the honey, nectar and pollen that they could in a few days.  I put the plywood touching the Nuc Box, so any nurse bees that wanted to come out and get the free goodness they could.  The nurse bees did do that from what I observed.  Good thinking on my part.

Why didn't I process the honey and keep it for myself.  One might wonder, right?  When I work with my helper and myself you have to think of the safety and what is going on and only be concerned about the bees.  Flying bees that have just had the home they lived in torn apart, they just are not appreciative of this sort of thing happening.  The concern is to get the bees moved in and the Nuc Box closed up.  Hope for the best too.  So trying to get honey comb is pretty much last on my list.  Since so much honey was in the colony I opted to just let the 3 bee hives have a free for all.  Processing honey would have been okay, but I was sticky enough and working for the 90 or so minutes dripping sweat was enough labor for me.
Sure I could have saved it and bagged it and done it the next day.  I would have had about 2 hours though of processing it and cleaning up the mess.  I also would have had to heat the honey above 130 degrees to kill any yeast in the honey to prevent fermentation.  It's just not that exciting to do such little and weighing the benefits I think the bees probably can use it much more then I can.
         
What transpired since I did the re-homing of the Owl House Bunch?   Bee hive #1 and 2 were not so happy.  They were the victims of confused bees that were trying to get in the bee hives they didn't belong to.  They were pretty much able to defend the bee hive from the  Owl House Bunch.   Lots of activity at the entrances of both hives.  I imagine some did penetrate and made it inside.  For a few days both bee hives were agitated because of this.  The ground lay littered with the aftermath of dead bees that stung, squished, stressed and stepped on.
  
The bees made quick work of the honey comb that was piled up.  The ants too loved it.  Honey drips and that too has a clean up crew.  The forager bees came back to the 4x4 post, I thought I could move them from the Owl Box to the bee stand if I could just get them on the box.  No luck after I screwed the owl house to the 4x4 post.  Oh well........  They'll figure it out hopefully.   They did.  Some bearding did occur, was not sure if they were going to stay or take off.  They stayed.  Looking at the acrylic bottom I peared in and I saw to my "HORROR" a bunch of brood that was white and dead.  Oh that's because I used wooden skewers and killed the innocent unborn bees.  I still will do skewers to hold comb VS that of use of rubber banding to hold the comb.  

What next.......  I am hoping I don't have to go into the hive and discard the larvae sitting at the bottom.   Other then that I do believe I have the queen.  The bees are not agitated, not making any overly defensive behavior of the area.   I removed some of the comb today prior to sunrise.
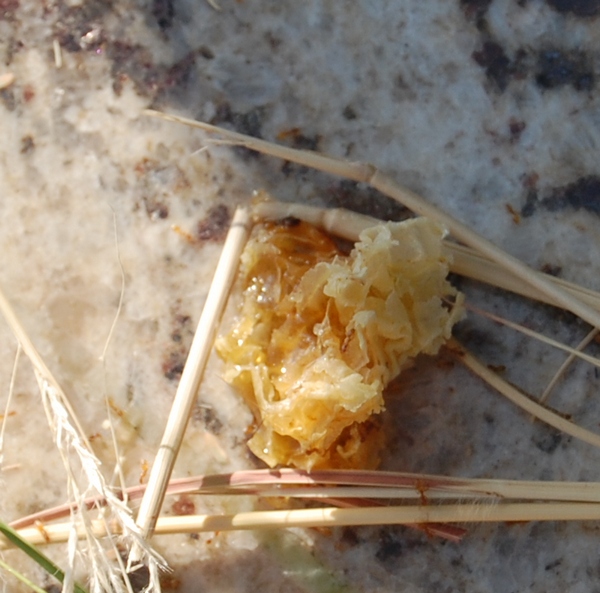
The photo is what I removed this afternoon that a few bees were still picking over.  It's not healthy to leave comb out in the open.  It invites wax moths and can attract 4 legged critters that I don't want hanging around.  I put the large comb in the refrigerator.  I might put some in a frame and put it in the Nuc box for the Owl Bunch to fix and use.  This will be in the box that I made in the earlier blog.  That box is for the honey stores for the bees.  Bee brood is the lower box and the bee honey food storage is on the top.  The bees do not have any comb on the 5 top frames.  Too much going on at the time to be concerned with putting honey comb in a bee hive.  It would have made a mess anyhow as honey drips down.  My thoughts are that this quantity of bees can draw comb out easily for the size of box and frames they have available to them.  Were going into Spring and have had 1/4" of rain.  Some pollen is available, so I think the bees will be just fine.

I still have to remove that piece of wood that the owl house was strapped to.  .  You can see the bees hanging out on the acrylic entrance.  That's right!  I have a piece of clear acrylic for a bottom.  Also, note the "YELLOW ROSE" in the back ground to the left.  Yellow rose of TEXAS!  Just had to point that out.  I planted 3 rose dwarf bushes in the rear of the bee hives.   I had to put wire around them because our wildlife deers and rabbits took a liking to eating them.

I believe in the queen of this hive to be a great queen that will direct the OWL HOUSE Bunch to a successful colony.  Long live the queen....  At least until next year.  Bee hive #1 will be re-queened in 2016 with a queen from beehive #2.  I really like#2 bee hive queen.  Great laying queen she is.  #1 is rather an okay queen, but not a great queen.  This is perhaps why it's good for bee keepers to have multiple hives so they have a comparison.  I wouldn't know that#1 queen is pretty much a average  queen otherwise.  #1 queen has been a disappointment.

Until next time.........  Don't swat at a buzzing bee.  They're most likely just curious.  Bees don't seek out to sting people.   Walk away.

"Zak" from Z's bees

Thursday, September 10, 2015

Wednesday, September 9, 2015

Successful move of Ferrell Bees to Nuc Box

To start the transfer of the bees into a Nuc box double deep, I needed to be well hydrated and fueled.  What better way then to eat a breakfast and some coffee. 
The day got a late start because I have work to do in the AM and this job with the bees is secondary.  I wanted to start at 9AM and be done at 11AM.  I started I think at 10:15 and finished at noon.  I don't have photo's of the removal, but I do have video's.  They're not uploaded at this time.  It will take a few days to do that I imagine.  Uploading is slow to YouTube. 

Preparations no matter what you do and think of something or a few things always are not thought of.  Nothing like having to stop in the middle of tearing comb out and trying to put in it a frame, only to realize you don't have a knife to cut the comb.  Run to the house and with sticky gloves you open the handle of the door and get a knife.  You now have honey coated door knobs and honey dripped from the gloves.  I forgot the bee broom too.  Smoker went out so Elisa had to light it again.

Show you some photo's of preparation prior to moving the bee hive to the bee stand.  Remember they were on the 4x4 wood post for the duration of acclimatization.  I should have put them on the bee stand where they are now as that's the permanent place they'll be.  I didn't know that until today why that is important.

I think I only put 1 frame of honey comb inside the Nuc Box double deep.  I had 4 frames of brood and honey.  Not much brood comb in the bee hive.  About 75 percent was honey comb.  Some capped and some not capped.  I didn't keep any of it.  I didn't want to fool with it.  I instead put it all on a piece of plywood and let the bees have at it at will.  They will clean it up and use it.  I then will throw it away as it will attract things I don't want near the bee hives. 

I didn't get stung and nor did "E".  She helped me out with this.  Lots of bees landed on both of us.  Dressing to not get stung is pretty much a smart thing to do.  These bees were very calm and gentle in comparison to my previous experience.  On a scale of 1 easy and nice and 10 being severerly dangerous this removal was a 2.5 

We spent about 25 minutes cleaning up and getting the bees off of us.  I returned about an hour later to see that the foraging bees had landed on the cardboard and massed.  I went to go get suited up again and dump them in the Nuc Box.  The foraging bees were clinging to the 4x4 pose in mass, so I scraped them with my hands onto an old cookie sheet.  I then attempted to dump them in the entrance of the bee hive.  It only was about 10 percent successful if that doing it.

Tonight I walked around and looked at the bee yard.  I had my red lens light on my phone.  Looked at the bees and it pretty much has some sort of order.  I don't know if it's because eventually bee hive #1 let them in or if the Nuc Box entrance was found.  Only a small cluster of about 300 bees were on the 4x4 post.  Scattered clusters are around the Nuc Box, cardboard and the original Owl House.  Hopefully Thursday some sort of order will start to play out.  Dead bees need to be cleaned out by the bees in the Nuc Box double deep and the rest of the bees that have not found the entrance need to have some sort of direction given to them by the foragers.  The bees know the land, but the nurse bees need the scent and activity to be guided I suspect to the entrance for those that remain.
to close the bee entrance
to catch the nurse bees that don't fly Makes it easier to sweep them up to put them in the NUC Box

Pry Bar used to remove the Owl Box Back to expose the bee hive.

Remember this is the box that I built.  This makes the 2nd box for the Nuc double deep.

I tried hard to have everything and think about it before I did the removal


Monday, September 7, 2015

Preperation for Owl House Bees to be moved to Nuc Box

Final preparation began today.   When you remove comb from a Ferrell bee hive, you need to put it in a foundationless frame.  Since comb is 2 sided, the use of a foundation frame can't be done.  

       The frames need .152" holes drilled in them. 
3 holes will be sufficient for the comb to be secured.
  This allows the skewer
to go through the top of the frame through the comb and into a 1/8" depth hole drilled to the bottom of the frame.  This is just a divot the end ot the skewer will sit.  It doesn't need to be drilled all the way through.  I have read about this method of securing comb into a frame.    Another method is using rubber bands stretched over the frames.   I will not ever use rubber band method for a removal to secure comb to the frame.  I was told by nearly all bee removal companies that using rubber bands to secure cut comb is what to do.   


Why I don't use the rubber band method this time or any other time?  Rubber bands are basically great for straitening out comb on foundationless frames when bees are drawing out comb.  My experience is that the bees tend to chew the rubber bands off prior to adhering it to the frame making it secure.  This causes the comb to fall over onto the next frame and of coarse bees then connect it together.  You can then see how much a Ferrell bee hive transfer of frames ends up being a huge mess.  Go grab a frame and you have 3 that are stuck together unfortunately.   I eventually ended up with a bigger mess then I started with.  In a 10 frame langstroth bee hive. It took me nearly 6 weeks to get rid of the comb and straighten out or organize the comb.  Most of it eventually got trashed.  When your dealing with bees that are queenless and Ferrell this can be a rather unpleasant situation.  The bees being at a heightened temperament and no ability to make comb.  Wax comes from nurse bees or young bees under 14 to 16 days old.  

          Using the skewer method you can see why it is I won't use the rubber band method.  Luckily I have a queen in this Owl House Bunch.  Hopefully she will live.  I will be extra careful when removing the bees over.  I will try to find her when doing the removal to be extra careful on that comb when doing the skewers.  

        The plan is on Tuesday PM or AM I have not decided, Use my bee hive tool and pry the wood apart.  It is held together with finishing nails.  An air gun was used to shoot finishing nails into the plywood, so unfortunately this is going to be more trama on the bees.  You typically don't want to be pounding on a bee hive.  If you do think it's okay to pound on a bee hive, you must not have all all your nuts and bolts in your head.   The advantage of the AM time frame is that I have light to work with and it's cool temps.  Drawback is you have upset bees all day long.  In the PM the bees are more settled and won't fly as much.   Just a theory.  After I get them transferred the bees at night will have a tendency to just go in and not fly around and stay put.  Again just a theory.  


       I will close the front of the bee hive heart shaped hole off to prevent free flight of the bees immediately.   Start wedging the hive tool in the front piece of plywood and hopefully get it pryed open enough I can pry the front off.    I then will be able assess the situation.  

       Some branches are in the bottom of the box that are part of the comb will need to be trimmed away.   Comb will have Larvae, honey and probably trash comb.  Trash comb is comb that isn't really used by the bees.  This being such a small hive I hope to save as much as possible.  Being the back side of summer and near fall I will give them as much honey comb as I can.  Normally when working a removal honey comb isn't saved and put in with the bees because it's a mess.  Your typically wanting just the brood comb.   

        I will probably not have the opportunity to take much video or photo's during all the removal and introduction to the Nuc box.  

       I will dress for battle.  I suspect the other 2 bee hives will not get worked up, but will plan for the worst.  2 layers of socks, winter boots, Sweat pants, short sleeve and long sleeve shirts, Dickies overalls, bee suit and of coarse gloves.   

On a scale of 1 being easy and 10 being the most dangerous I would peg this as a level 4 because it's not got many bees and the bee temperament has been very calm.  They're more gentle then the 2 bee hives I have currently.    My first Ferrell bee hive removal I did was a 10.  I was on my back with 24" to work with above me to remove comb and I had probably 50,000 bees that were not happy.   I had a safe zone on that removal that was about 1/3rd of a mile away.  


Thursday, September 3, 2015

Picture of my 3 bee hives sleeping

I got home and wanted to see how my bees were doing.  It was dark, so I turned on my phone light that has a red light option.  This doesn't disturb the bees I believe. 
This is what I saw.
Owl   House Bunch
Bee Hive #2
BEE HIVE #1 with entrance recuder
The owl house you can tell that they're massed in the front blocking off the cooler night time air regulating the inside so that they maintain temperature 92 to 94 for the brood to develop.  Bee hive #2 is clustered on the far left side, so you could pretty much tell the brood is on the left side of the bee hive.  The last photo is the bees are clustered on the entrance with a reducer.  I put the reducer on even though it's 95 to 100 degrees.  I do this because I have a bottom screened bottom board.  I do have a piece of plastic on the underside of the screen blocking the wind some what.  It's interesting to see the dynamics of the bees and knowing exactly what it is they're doing.   Because you can clearly see I have the reducer on a bottom board is not a good choice to have.  Too much of a draft for the bees to regulate the temperature inside the bee hive.  I will remove it this fall and replace it with a solid bottom board.

Tuesday, September 1, 2015

Owl House Bee Bunch

Today was a hard day I imagine for them.  They went from shaded quiet setting to full sun and new land that they don't know anything about.  Temp today was 98 degrees.  Every bee I saw was fanning frantically and the noise was like a fan with a motor on it.  Just that low noise humming.  So hot that the bees couldn't land on the landing board to fan.  Hard to fan on the front of the hive too.  Bees would land then take off, too hot for the feet. 

Monday morning I witnessed some circle flights that were orienting.  This evening I did go out and take a short video.  I didn't have my bee suit on and it appeared as though more bees were out then I realized.  I did feed them 1:1 syrup and had a bowl of water for them that I put on top. 

All is as good as it's going to get I imagine.   The surprise is that Bee Hive #1 and 2 do not have anything to do with them from what I have observed.  I did have to kill some assasinbugs on the bee hives as I do this daily in the AM/PM.  Owl house is no exception. I did see  1 on the screen of the watering bowl with a bee it caught.  I tried to crush it with the plexiglass and a brick, but it flew off.    I will try and take a photo and post it later on here.

This afternoon after thinking about the construction of the Owl Box trying to come up with a way to not destroy it, I realized that the entrance is backwards.  I was wishing that the hole was at the top because it would ventilate better   If I drill it I risk possible killing the queen and making a mess.  I have not looked at it to see how it's put together.  I am thinking it was air gun brad nailed.  Wishing it was screwed together.   I think a pry bar is going to be the way to do it.  Hammer and prybar.  Just imagine the disturbance to the bees that's going to make.  Guess that's better then using a jig saw or sawzall on it. 

This evening about 7:20 to 7:45 the bees came out in mass.  I took a video of it.  

Zak